• This is default featured slide 1 title

    Go to Blogger edit html and find these sentences.Now replace these sentences with your own descriptions.This theme is Bloggerized by Lasantha Bandara - Premiumbloggertemplates.com.

  • This is default featured slide 2 title

    Go to Blogger edit html and find these sentences.Now replace these sentences with your own descriptions.This theme is Bloggerized by Lasantha Bandara - Premiumbloggertemplates.com.

  • This is default featured slide 3 title

    Go to Blogger edit html and find these sentences.Now replace these sentences with your own descriptions.This theme is Bloggerized by Lasantha Bandara - Premiumbloggertemplates.com.

  • This is default featured slide 4 title

    Go to Blogger edit html and find these sentences.Now replace these sentences with your own descriptions.This theme is Bloggerized by Lasantha Bandara - Premiumbloggertemplates.com.

  • This is default featured slide 5 title

    Go to Blogger edit html and find these sentences.Now replace these sentences with your own descriptions.This theme is Bloggerized by Lasantha Bandara - Premiumbloggertemplates.com.

alan rickman


Alan Rickman was a British actor who was known for his roles in films such as Die Hard, Robin Hood: Prince of Thieves, and the Harry Potter series. He was born in London in 1946 and studied graphic design at Chelsea College of Art and Design. After graduating, he decided to pursue a career in acting and trained at the Royal Academy of Dramatic Art.

Rickman made his film debut in 1988 with the role of Hans Gruber in Die Hard. He went on to appear in a number of other successful films, including Robin Hood: Prince of Thieves, Sense and Sensibility, and Galaxy Quest. He also had a successful career on stage, appearing in productions of plays such as Les Liaisons Dangereuses and The Cherry Orchard.

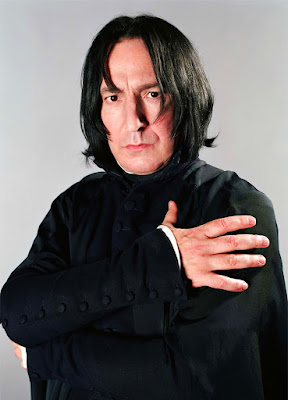
Rickman is perhaps best known for his role as Severus Snape in the Harry Potter series. He played the character for eight films, from Harry Potter and the Philosopher's Stone to Harry Potter and the Deathly Hallows – Part 2. Snape was a complex and challenging role, but Rickman brought him to life with his trademark wit and charm.

Rickman was a talented actor who was known for his versatility and range. He could play both villains and heroes, and he always brought a sense of intelligence and depth to his characters. He was also a gifted stage actor, and he was respected by his peers for his dedication to his craft.

Rickman died of pancreatic cancer in 2016 at the age of 69. He left behind a legacy of memorable performances that will continue to be enjoyed by fans for years to come.

Here are some additional facts about Alan Rickman:

  • He was a talented musician and played the guitar, piano, and cello.
  • He was a keen photographer and had his own darkroom.
  • He was a lifelong fan of the band The Smiths.
  • He was a vocal supporter of human rights and environmental causes.
  • He was a private person who shied away from the spotlight.

Alan Rickman was a unique and talented actor who will be missed by many. His work will continue to inspire and entertain audiences for years to come.

Share:

Faking GPS location / gps spoofing in Windows

Faking GPS location in Windows 10 is quite a different thing.  This tutorial explains how to fake GPS location in Windows 10. To do this, I will use a free command line tool, FakeGPS that lets you set a fake GPS location in Windows 10. This tool installs a fake virtual GPS device in your PC and you can set any location in that. The applications that use your location such as Cortana, Maps, and some others will shows that fake location in them. This tool allows you to set any location using latitude, longitude coordinates. And if your don’t know the coordinates of certain locations, then you can use a website or a Google Sheet to geocode address to lat, long. However, your current location via IP address will still be visible in online applications such as Google.

Faking GPS location in Windows 10 is quite a different thing. You can actually fake your GPS location without actually having a GPS device in your PC. This tool will set the desired coordinates in the system registry. And the other applications will use them to read your current location. Also, with this tool, you can query your current location anytime you want.

fake gps location in windows 10

How to Fake GPS Location in Windows 10?

FakeGPS operates with just two simple commands. It comes with a GPS driver that you can install to fake a GPS device in your PC. And once you have installed the tool and set the location, the applications will keep using that location.

These steps will help you fake GPS location in Windows 10.

Step 1: At first, turn on the test mode on Windows 10. For that open command prompt with administrator rights and run this command. After running this, reboot your PC once.

bcdedit /set testsigning on

enable test mode windows 10

Step 2: Now, install the fake GPS driver in your PC. For that, type “devmgmt.msc” in Run. Or, you can also search it in Start by typing “”Device Manager”. Use the Action >  Add Legacy Hardware. After that add hardware wizard will open up and proceed with the option “Install the hardware that I manually select from a list“.

device manager add a legacy hardware

Step 3: Now from the list of hardware devices, select “Show All Devices” and then click Next. After that, from the Next window, click on Have Disk button and specify the INF file to install the driver. The INF file that you have to specify is “x64 driver\FakeGPS.inf”. Proceed with the further process and accept the warnings that it gives. Since, then driver is not signed, so you will receive security warnings. So, accept them all and continue with the installation of the driver.

install gps driver via legacy device

Step 4: Now, the FakeGPS driver has installed, and you need to restart your PC one more time. And after rebooting go to the FakeGPS folder that you have downloaded(link at the end). And then open the command prompt(in admin mode) in the same folder where the “FakeGPS.exe” is visible. To set up fake coordinates, type the following command.

FakeGPS -s "latitude,longitude"

fake gps set coordinates

Step 5: If you want to query the current coordinates, then you can run this command. Also, you can run this command to ensure that the coordinates that you have set are saved in the registry.

FakeGPS -g

fake gps get coordinates

That’s all about how you can fake GPS location in Windows 10. The above steps will be enough to make you understand how to do that with the help of freeware FakeGPS tool.

Closing Words

FakeGPS freeware is a unique tool that I have used to fake GPS location in Windows 10. It makes it pretty easy to set specified coordinates in your PC that the applications will use. And I like one thing about it that in-spite of being a command line tool, it has made it very simple to set location in system’s registry. You can now install a fake GPS device in your PC and fake GPS location as well.

Download FakeGPS for Windows 10 here

Share:

How To Install qBittorrent On Ubuntu


qBittorrent, free and reliable P2P bittorrent client, reached the new major 4.0.0 release a few days ago with many new great features and numerous bug-fixes.

qBittorrent 4.0.0 features:

  • Change qbittorrent logo.
  • New icon theme with SVG source
  • Drop Qt4 support.
  • UI for managing locally banned IP list
  • Support for specifying where to save/load config files. Support for portable mode.
  • Possible to pass options via ENV variables
  • Implemented share limit by seeding time
  • Enable drag n drop to create torrent on mainwindow
  • Use the system icons for each file type in the Content tab
  • Add show/hide statusbar option
  • Linux: Allow custom tray icons when system icon theme is used
  • And so many other changes.
qbittorrent 4

How to Install qBittorrent 4.0 in Ubuntu:

The qBittorrent stable PPA contains the latest packages for Ubuntu 16.04, Ubuntu 17.04, Ubuntu 17.10, and Ubuntu 18.04.
Open terminal either via Ctrl+Alt+T or by searching for ‘terminal’ from app launcher. When it opens, do:
1. Run command to add the PPA repository:

sudo add-apt-repository ppa:qbittorrent-team/qbittorrent-stable

Type your password (no visual feedback while typing) when it prompts and hit Enter.
qbittorrent-ppa
2. Then upgrade qBittorrent via Software Updater if you have a previous release installed.
upgrade-qbittorrent
or run following commands one by one to check updates and install / upgrade the bittorrent client:

sudo apt-get update
sudo apt-get install qbittorrent

Uninstall:

You can easily remove the PPA repository via Software & Updates utility under Other Software tab.
To remove qBittorrent, either use your system package manager or run command:

sudo apt-get remove --autoremove qbittorrent
Share:

How To Install PulseAudio Equalizer & PulseEffect On Ubuntu


PulseAudio Equalizer is a 15 bands system wide equalizer, that means any application that is using PulseAudio, will benefit from the sound improvement.

sudo add-apt-repository ppa:nilarimogard/webupd8
sudo apt-get update
sudo apt-get install pulseaudio-equalizer


 After Installing PulseAudio Equalizer install pulseeffects for more improvement.

Installation from Source

All commands on this page, unless otherwise specified, are expected to be run as an unprivileged user (not root). Whenever root privileges are necessary, sudo will be used. If sudo is unavailable you may become root using su -, at which point you may execute any command as the root user. Use exit to become a normal user again.

Debian / Ubuntu

Debian 10 (Testing) / Ubuntu 17.10 and newer

Building and Installing a Debian Package
1. Clone the Repo
Clone the git repository and checkout the latest supported release. Unless you are testing the master branch of PulseEffects, you also want to checkout the latest supported release.
If you don't already have git installed, simply install it with  

sudo apt install git.
git clone https://github.com/wwmm/pulseeffects.git
cd pulseeffects
git checkout v3.0.7

2. Install Build Dependencies
Install some Debian tools, needed for building the package.
sudo apt install devscripts equivs
Now let's build and install a dummy package pulseeffects-build-deps, which will depend on all packages required to build the package.
sudo mk-build-deps --install debian/control
3. Build the Package
To build your own package, simply run debuild from inside the source tree. dpkg-buildpackage options may be given on the command line.
Explanation of the options:
  • The -us -uc flags builds the package without signing it. Since the package maintainer's private key is unavailable the package cannot be signed. Signing is unnecessary, unless a user plans to redistribute their package in their own repository.
  • The -i flag will exclude the .git directory from the generated source tarball.
debuild -i -us -uc
See the full debuild and dpkg-buildpackage manpage for more options.
4. Remove Build Dependencies (Optional)
At this point, you may remove the build dependencies if you wish to save some space. Although if you plan to build every release from source you might as well keep it.
sudo apt purge pulseeffects-build-deps
sudo apt autoremove --purge
5. Install the Package
The finished Debian package will be located at ../pulseeffects_%VERSION%_%ARCH%.deb. You may install it in numerous ways but the easiest command line method is the following:
sudo apt install ../pulseeffects_*.deb
Some graphical alternatives you might consider are gnome-software or gdebi.
Manual Installation
This does not make use of the Debian packaging system.
sudo apt update
sudo apt install --no-install-recommends git meson ninja-build pkg-config
sudo apt install --no-install-recommends libgtk-3-0 python3-gi python3-gi-cairo python3-numpy python3-scipy \
libgstreamer1.0-0 libgstreamer-plugins-good1.0-0 libgstreamer-plugins-bad1.0-0 python3-gst-1.0 swh-plugins
The following dependencies are only required to pass the Meson dependency checks. Specifically the packaged pkg-config files are required by Meson. Once PulseEffects is installed these are no longer required.
sudo apt install --no-install-recommends libgtk-3-dev python-gi-dev python3-cairo-dev \
libgstreamer1.0-dev libgstreamer-plugins-bad1.0-dev libpulse-dev
 

Share:

How To Install Grub Customizer on Ubuntu 17.10


How to install Grub Customizer on Ubuntu 17.10. Learn how to use Grub Customizer. Grub Customizer is a wonderful application that allows user to edit the menu entries from the GRUB booting screen. Grub Customizer has a graphical interface to configure the GRUB2/BURG settings and menu entries.


Grub Customizer Features:
  • move, remove or rename menuentries (they stey updatable by update-grub)
  • edit the contents of menuentries or create new ones (internally it edits the 40_custom)
  • support for GRUB2 and BURG
  • reinstallation of the bootloader to MBR
  • settings like default operating system, kernel params, background image and text colors etc.
  • changing the installed operating system by running on a live cd

Install Grub Customizer 5.0.5

Grub Customizer 5.0.5 is the latest version available of the Grub Customizer software. Grub Customizer 5.0.5 can be installed on Ubuntu Systems, via PPA. Run the following commands to install Grub Customizer 5.0.5 on Ubuntu:

sudo add-apt-repository ppa:danielrichter2007/grub-customizer
sudo apt-get update
sudo apt-get install grub-customizer


If you want to uninstall and remove the Grub Customizer from Ubuntu Systems, run the command given below:

sudo apt-get remove grub-customizer
Share:

How Install Package Control on Sublime Text


 The simplest method of installation is through the Sublime Text console. The console is accessed via the ctrl+` shortcut or the View > Show Console menu. Once open, paste the appropriate Python code for your version of Sublime Text into the console.Then Press Enter

import urllib.request,os,hashlib; h = '6f4c264a24d933ce70df5dedcf1dcaee' + 'ebe013ee18cced0ef93d5f746d80ef60'; pf = 'Package Control.sublime-package'; ipp = sublime.installed_packages_path(); urllib.request.install_opener( urllib.request.build_opener( urllib.request.ProxyHandler()) ); by = urllib.request.urlopen( 'http://packagecontrol.io/' + pf.replace(' ', '%20')).read(); dh = hashlib.sha256(by).hexdigest(); print('Error validating download (got %s instead of %s), please try manual install' % (dh, h)) if dh != h else open(os.path.join( ipp, pf), 'wb' ).write(by)  
Share:

Search This Blog

Powered by Blogger.

Blog Archive

alan rickman

  Alan Rickman was a British actor who was known for his roles in films such as Die Hard, Robin Hood: Prince of Thieves, and the Harry Potte...

Labels

Recent Posts

Unordered List

  • Lorem ipsum dolor sit amet, consectetuer adipiscing elit.
  • Aliquam tincidunt mauris eu risus.
  • Vestibulum auctor dapibus neque.

Pages

Theme Support

Need our help to upload or customize this blogger template? Contact me with details about the theme customization you need.